A reasonably the priced cargo bike
Motivation for building my cargo e-bike
The cargo bicycles are elongated bikes used to carry heavy loads. These bicycles are extremely popular all over the world and can move everything from construction materials to groceries. I recently found myself in regular need of some way to carry heavy and bulky items to and from my off grid property. Unfortunately for me and the rest of the world, cargo bicycles tend to be extremely expensive. Oftentimes ranging between $1000 and $3000 for a bicycle. I live a car free lifestyle. And like all people who live there life without a car. drivers licenses. Or any desire to own these things. I often have a problem, namely how to move large items. Enter the idea of the cargo bike.
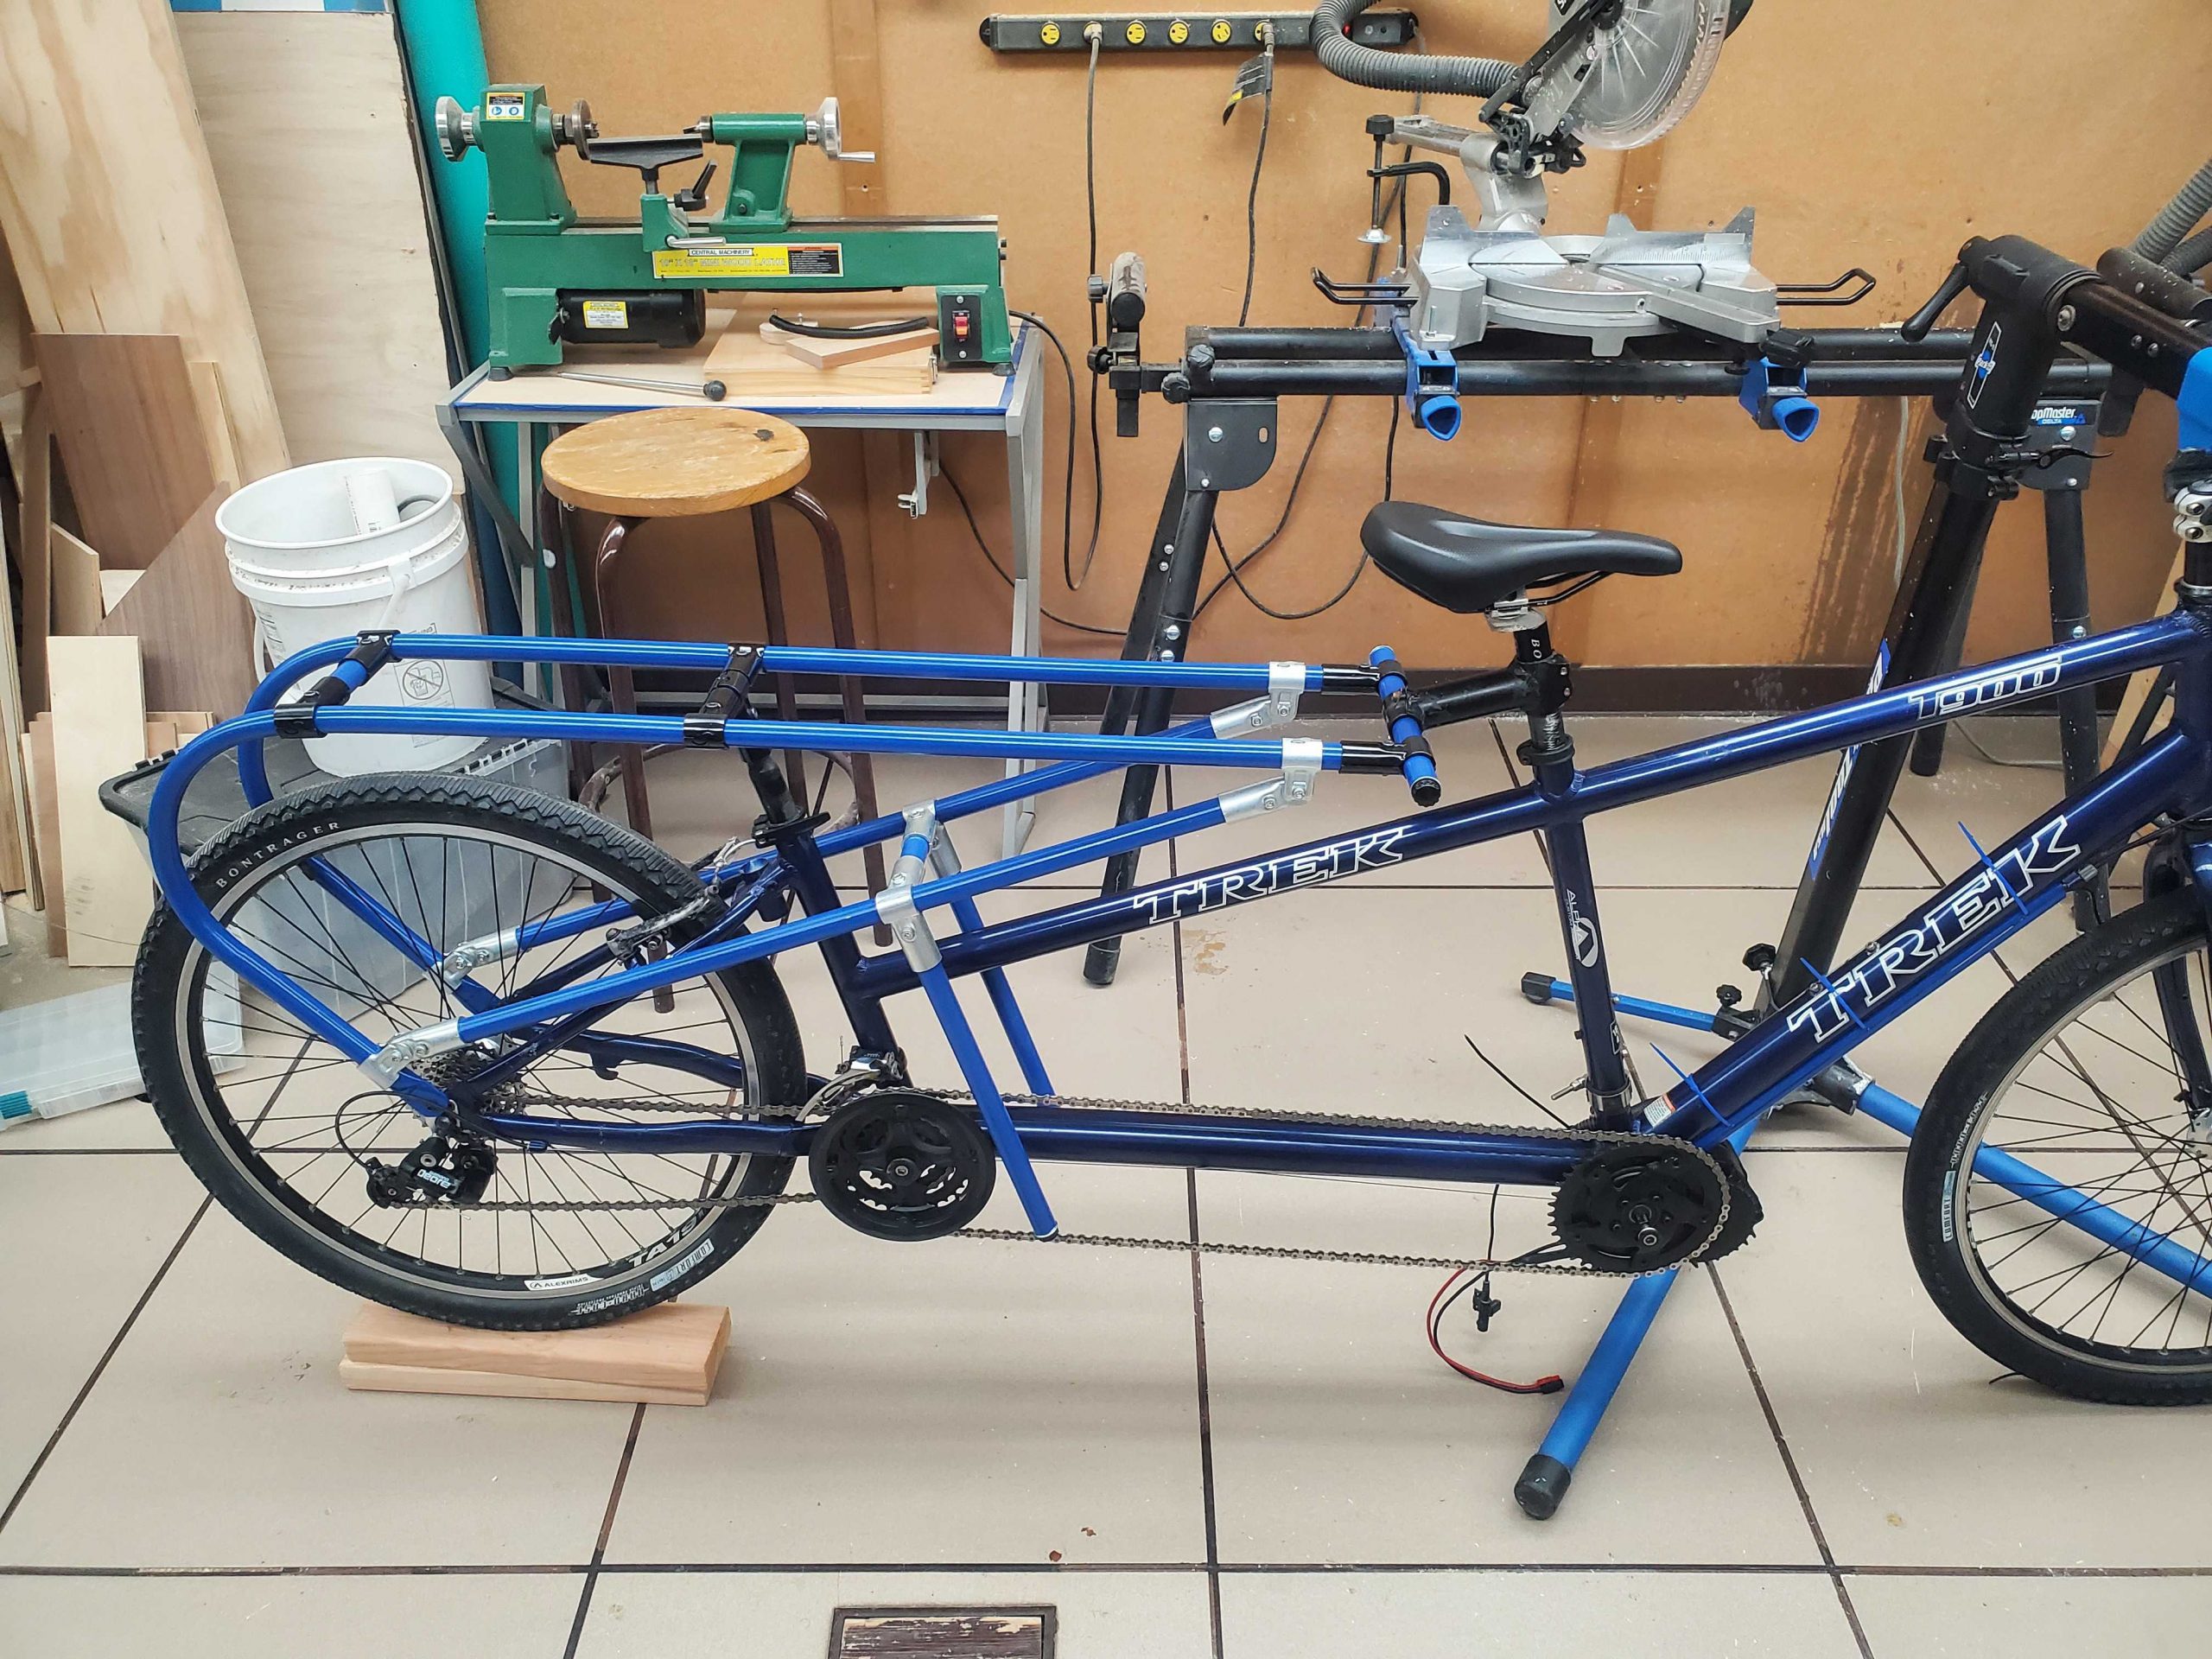
I definitely wasn’t going to pay that much. After looking around for ideas I discovered that I could find heaps of tandem bicycles second hand. For those who don’t know a tandem bicycle is a normal bicycle with 2 riding positions they are elongated much like a cargo bicycle and are expensive new. Thankfully they are also difficult to ride and fix and have been the death of any number of relationships. So the second hand market is flooded with barely ridden tandems with high end components that can be had for a 100 dollars or less. I decided that 1 of these tandem bicycles would make the base for my new cargo bike.
Using conduit
After looking around at materials I decided to build my cargo rack out of 3/4 inch electrical conduit. Electrical conduit or EMT can be had at any local hardware store and comes in 10 foot sticks as well as a few MakerPipe conduit brackets. These brackets are cheap and easy to order from MakerPipe. The total cost of this rack was around $80 including the fasteners and paint. This rack also does not require welding or expensive or hard to use tools. The whole thing could be done with a power drill, a hammer and a hacksaw. Though thanks to my local makerspace I had access to many more tools then this.

Making the rack
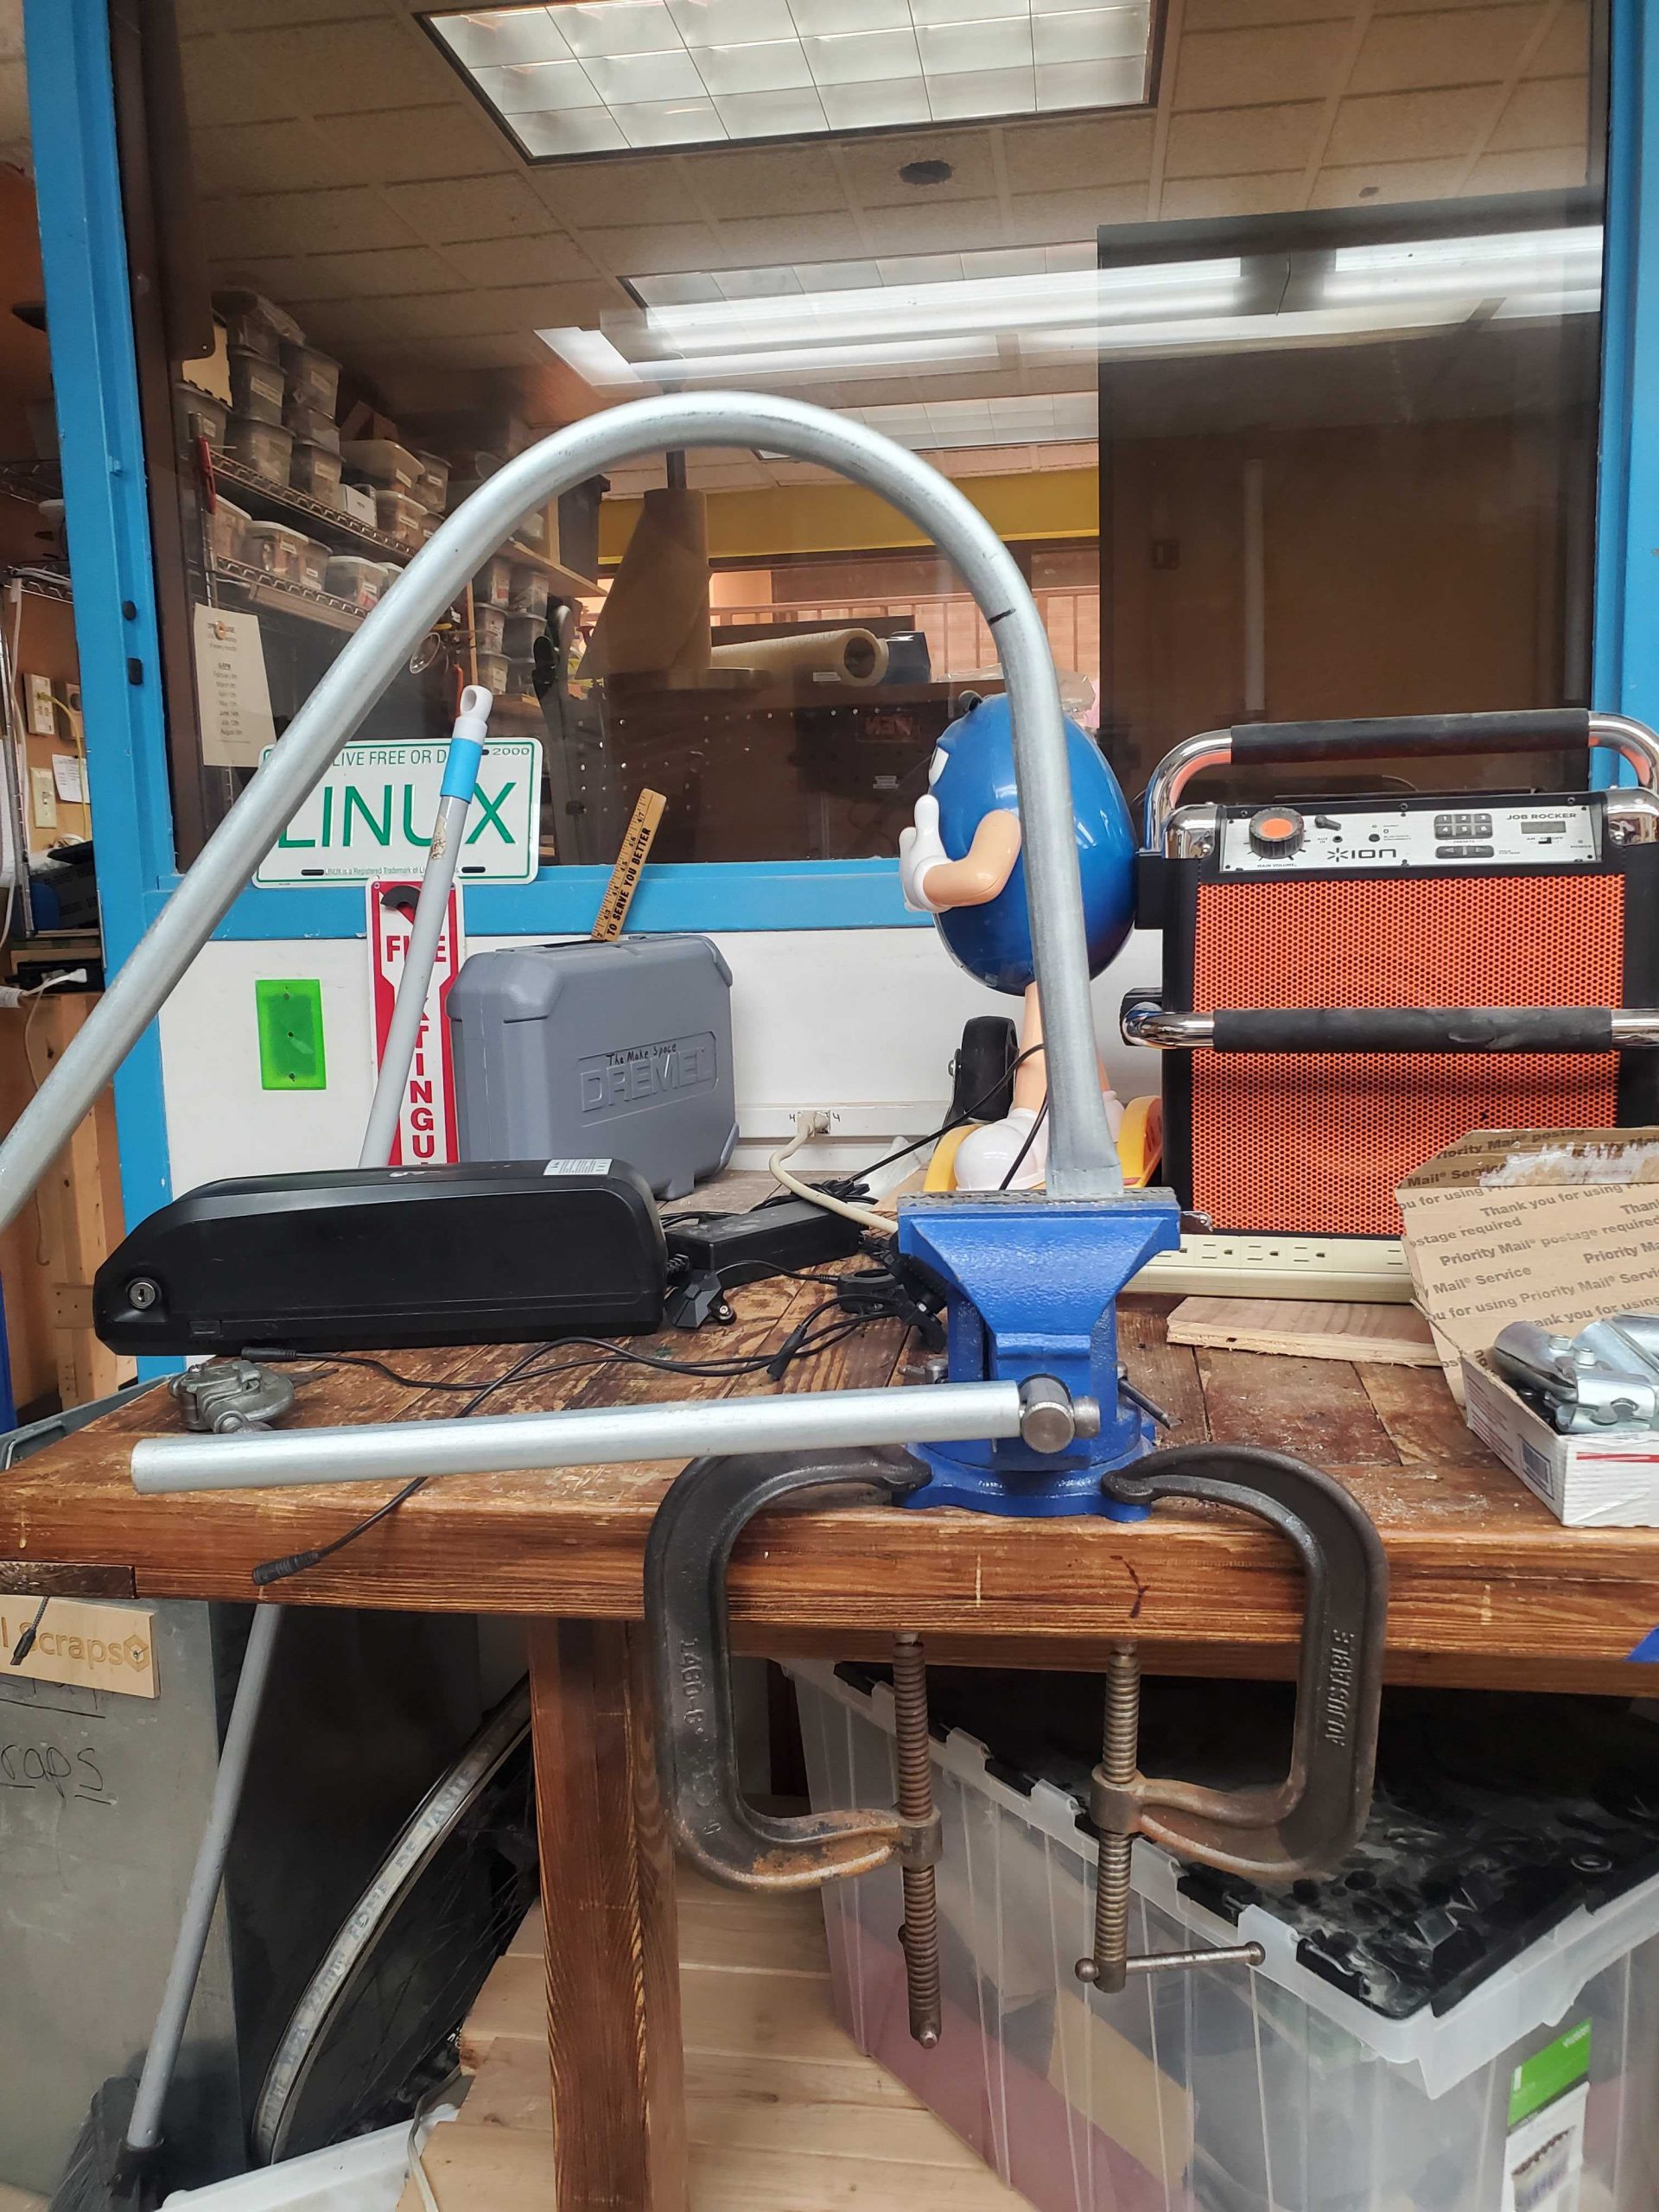
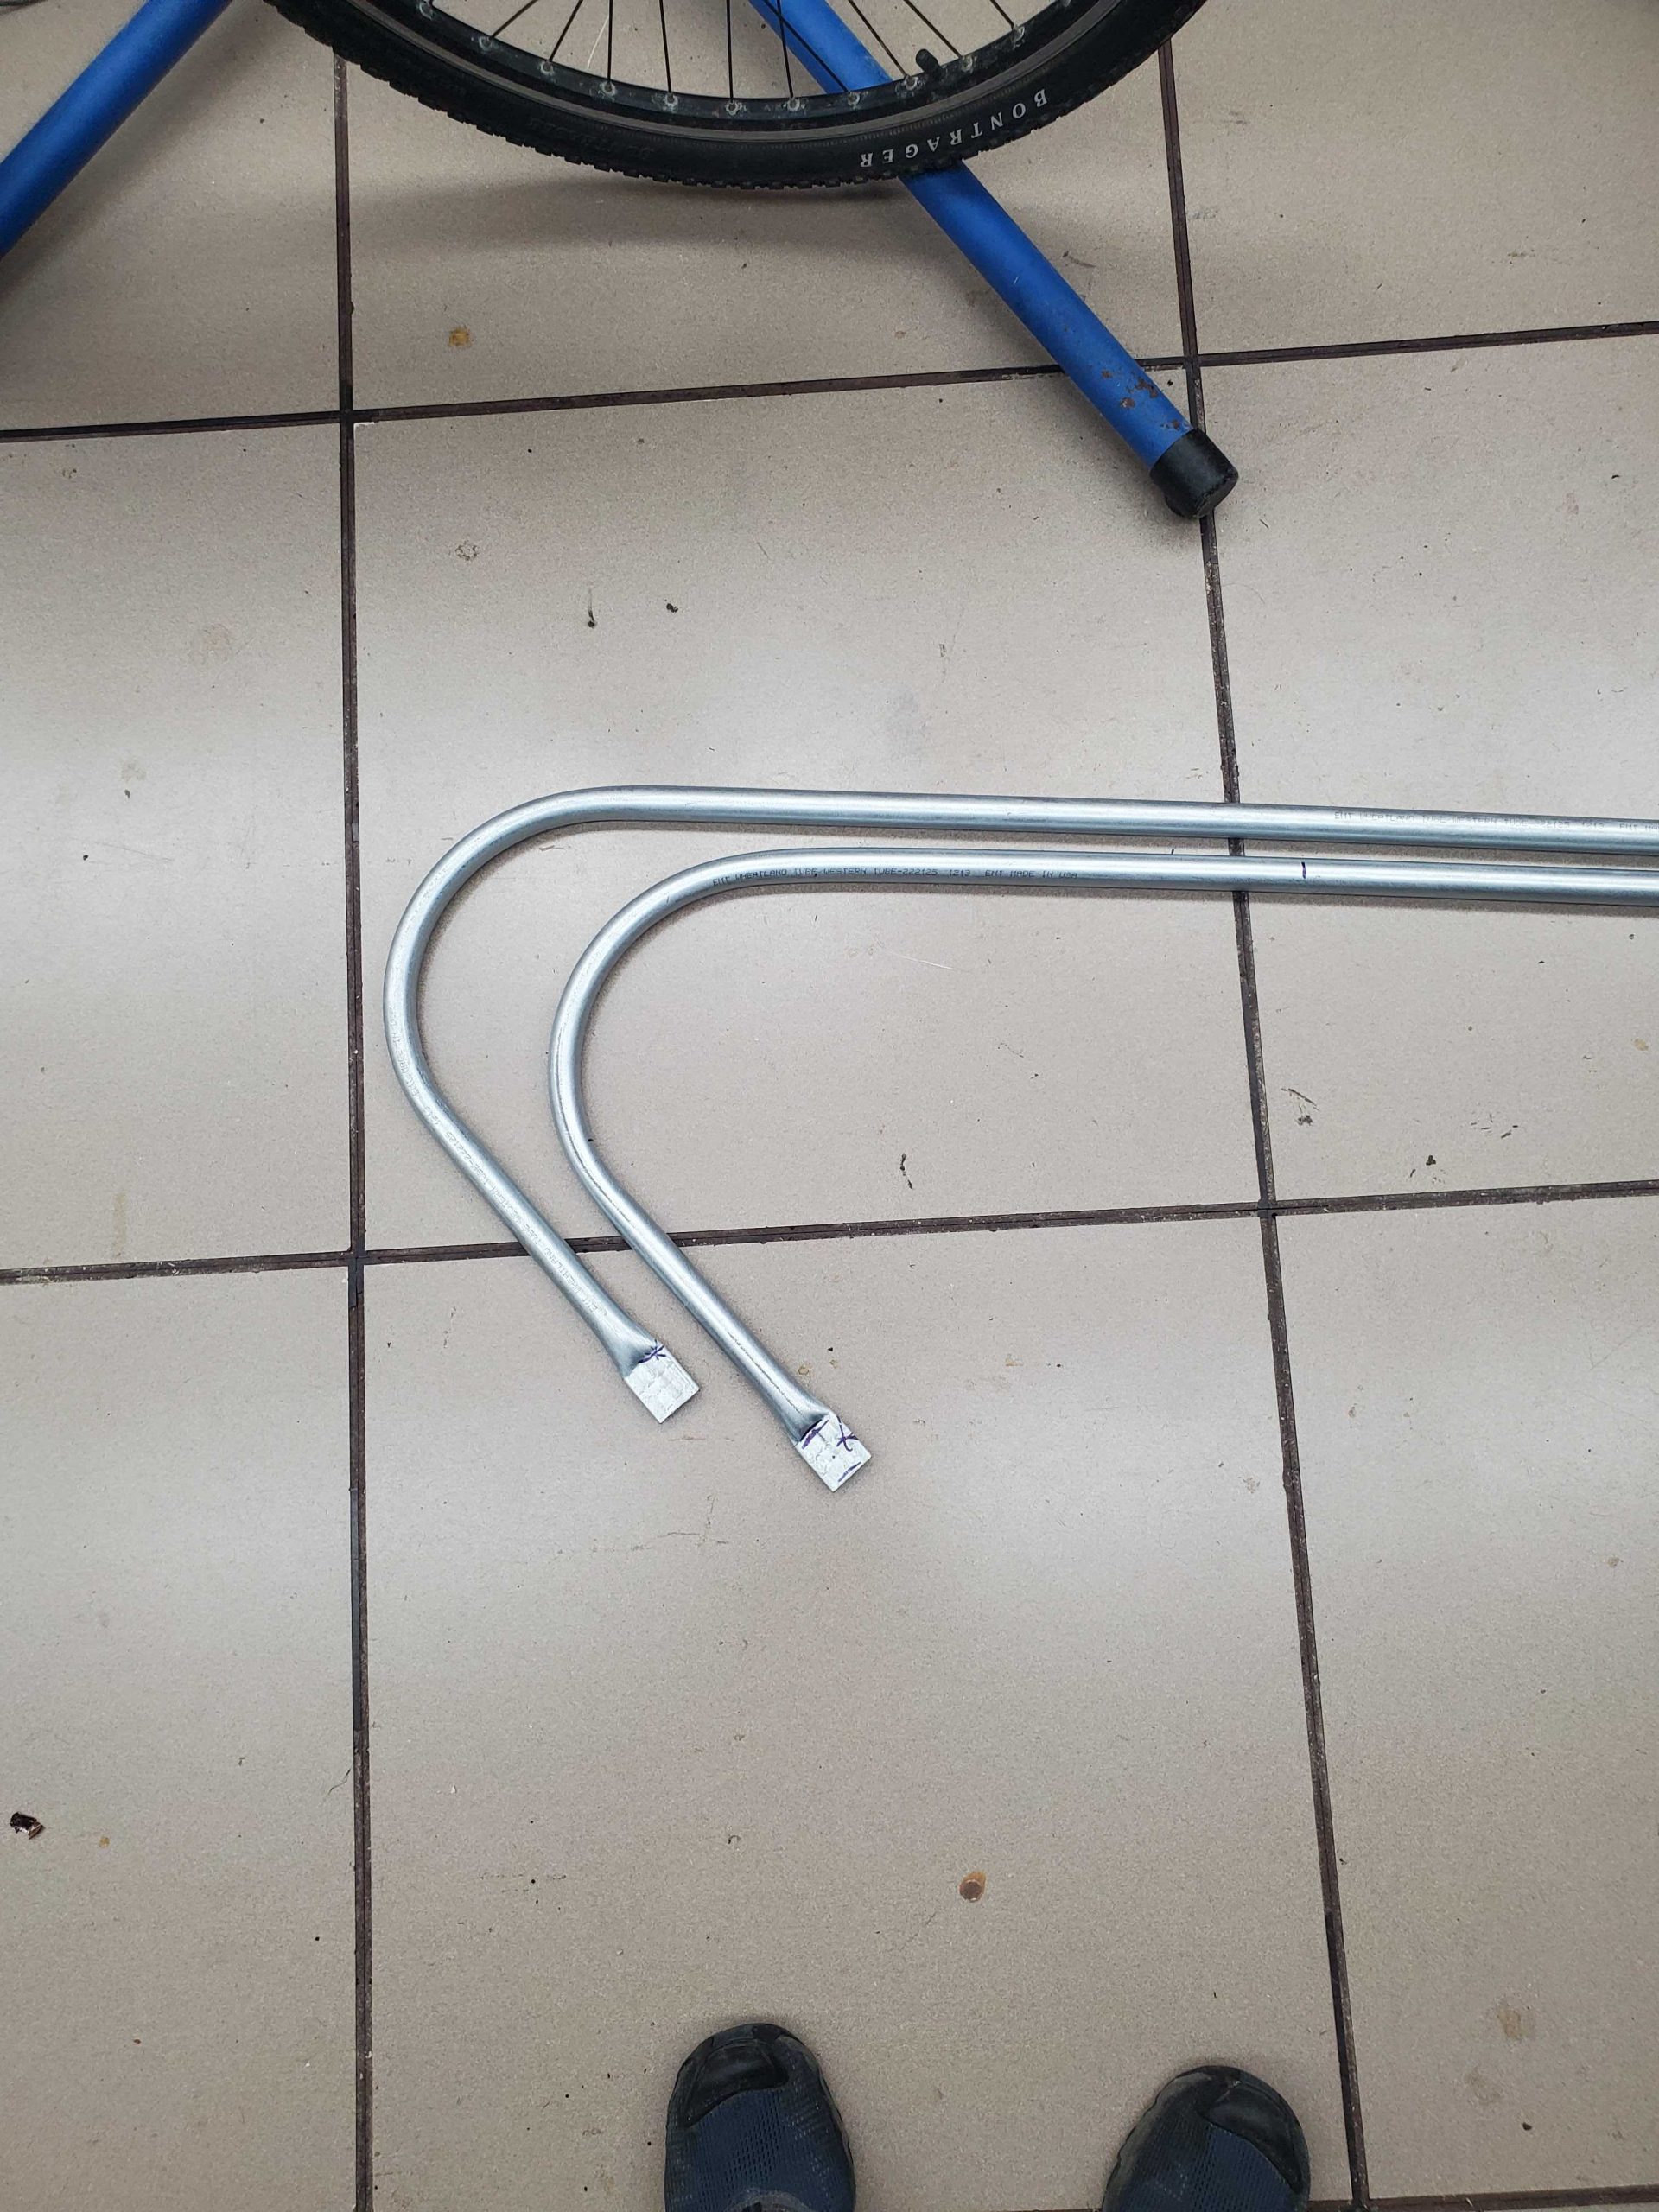
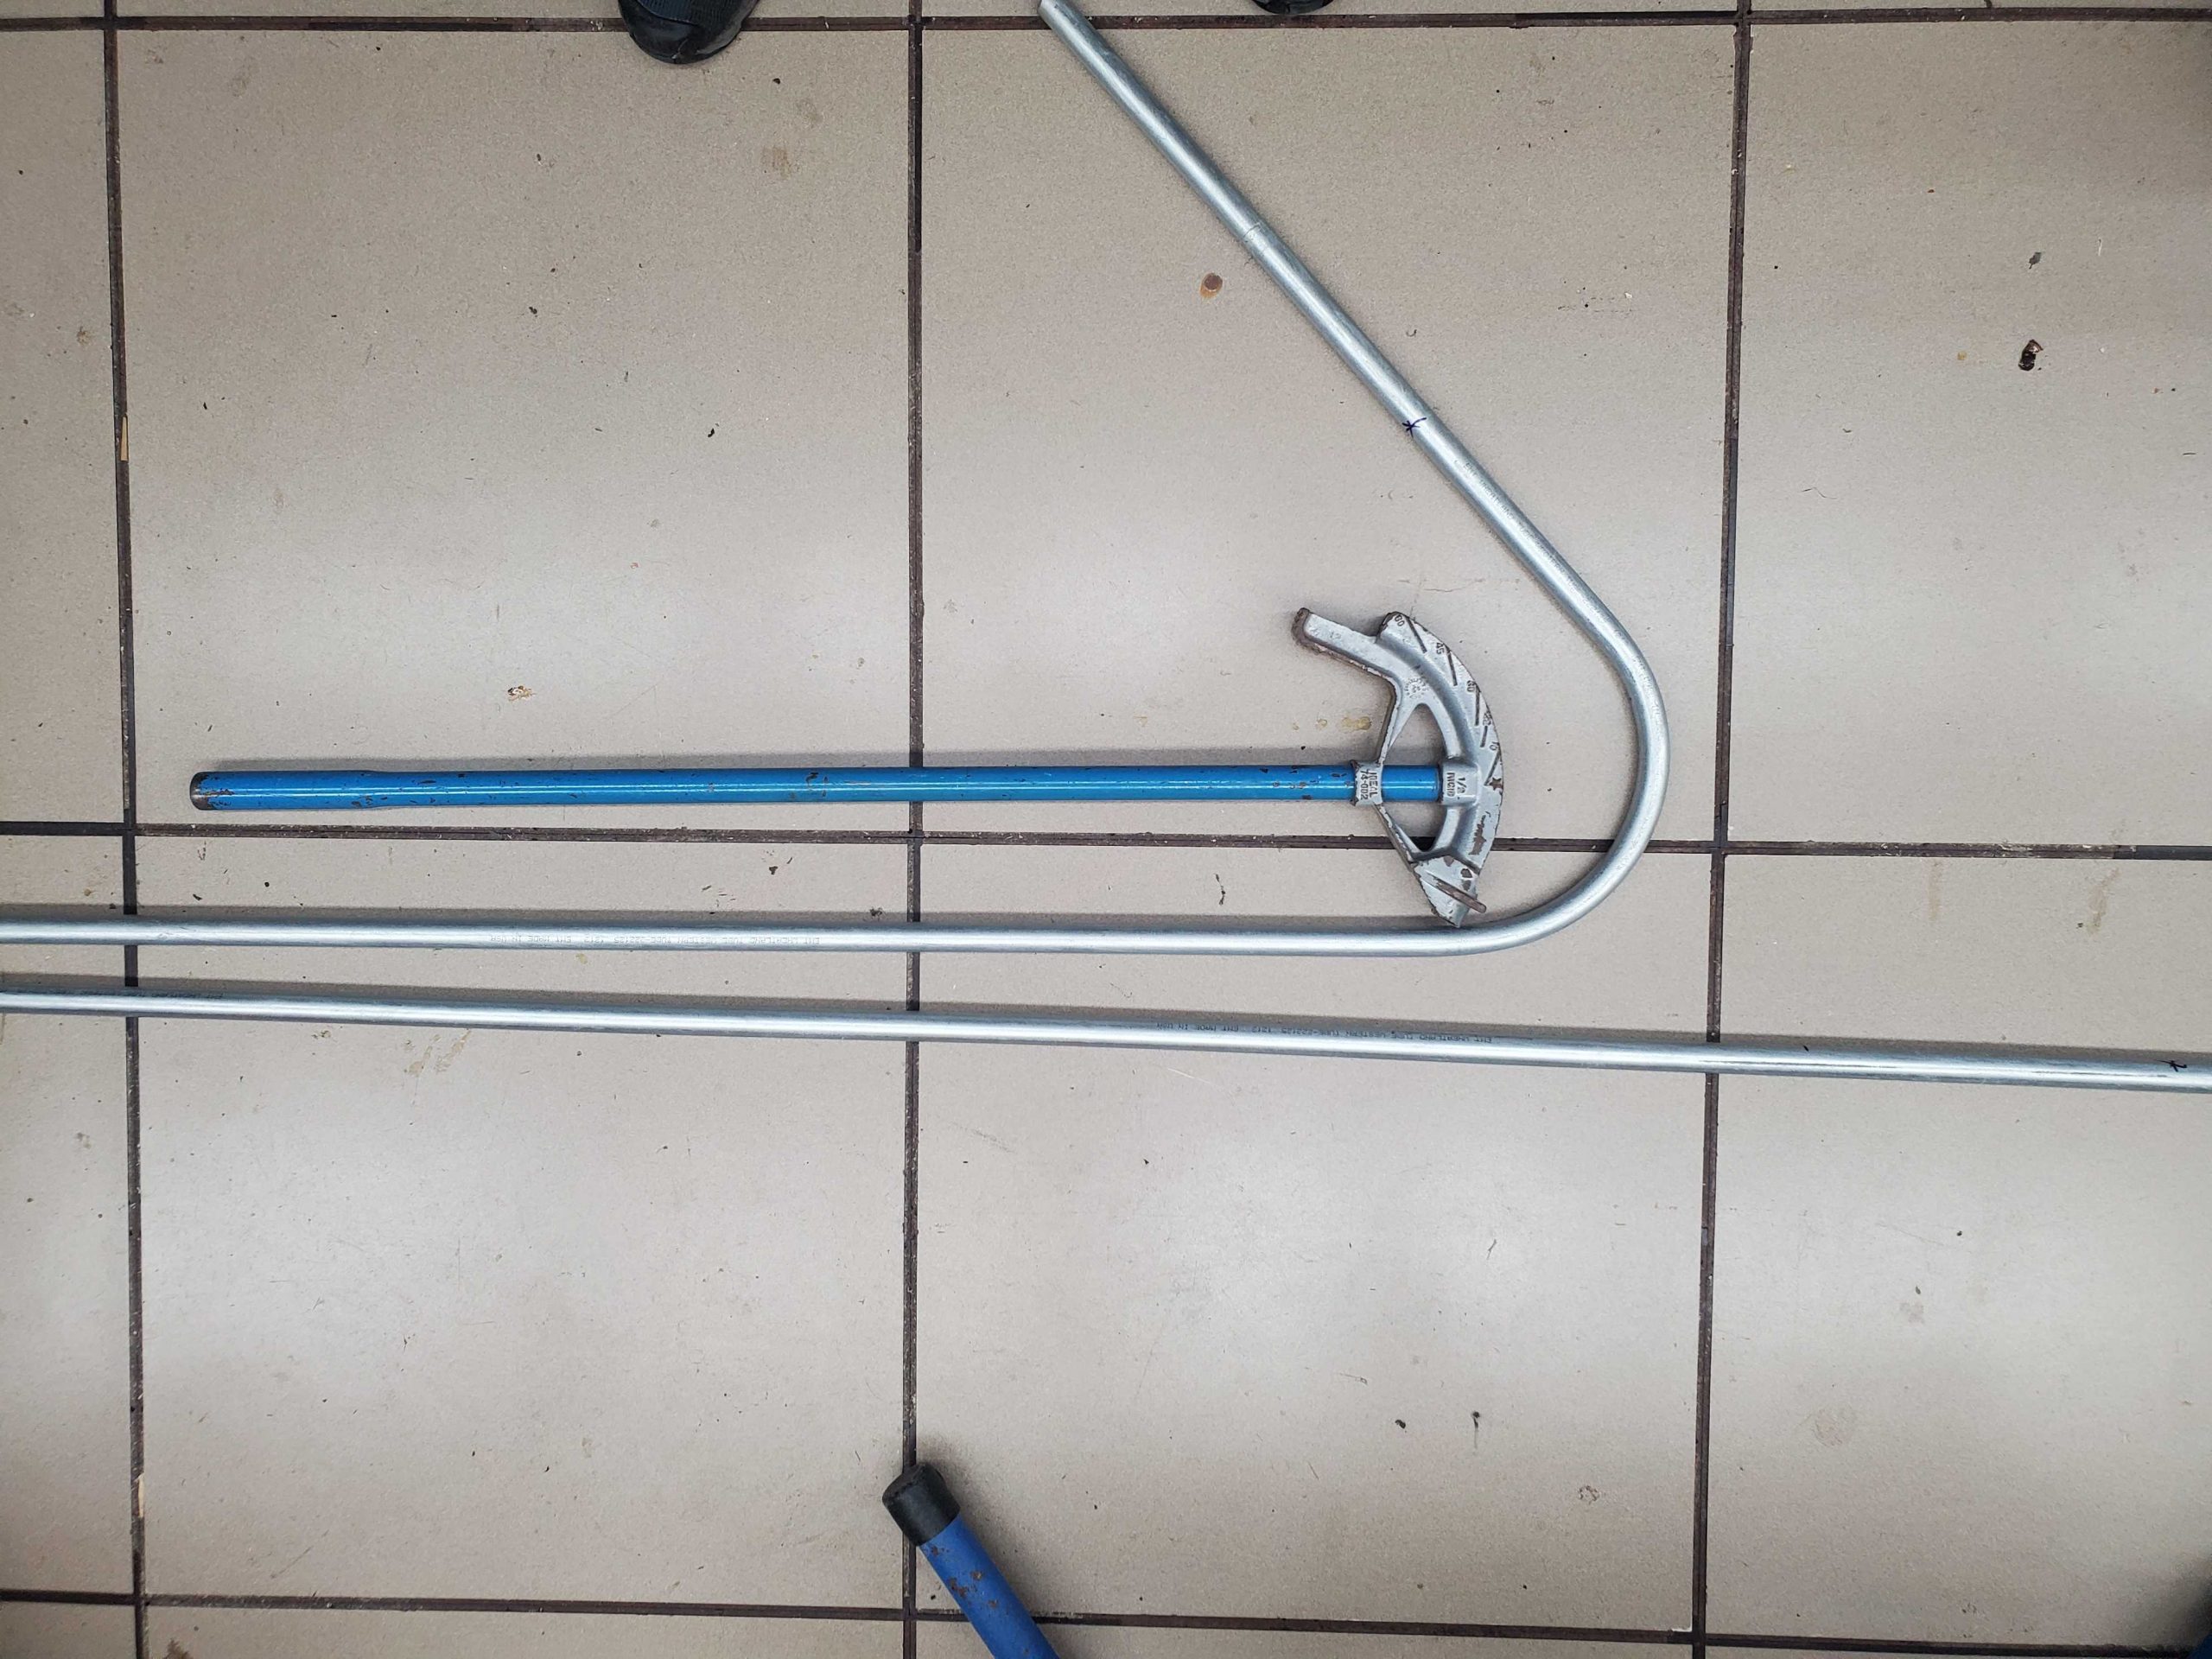
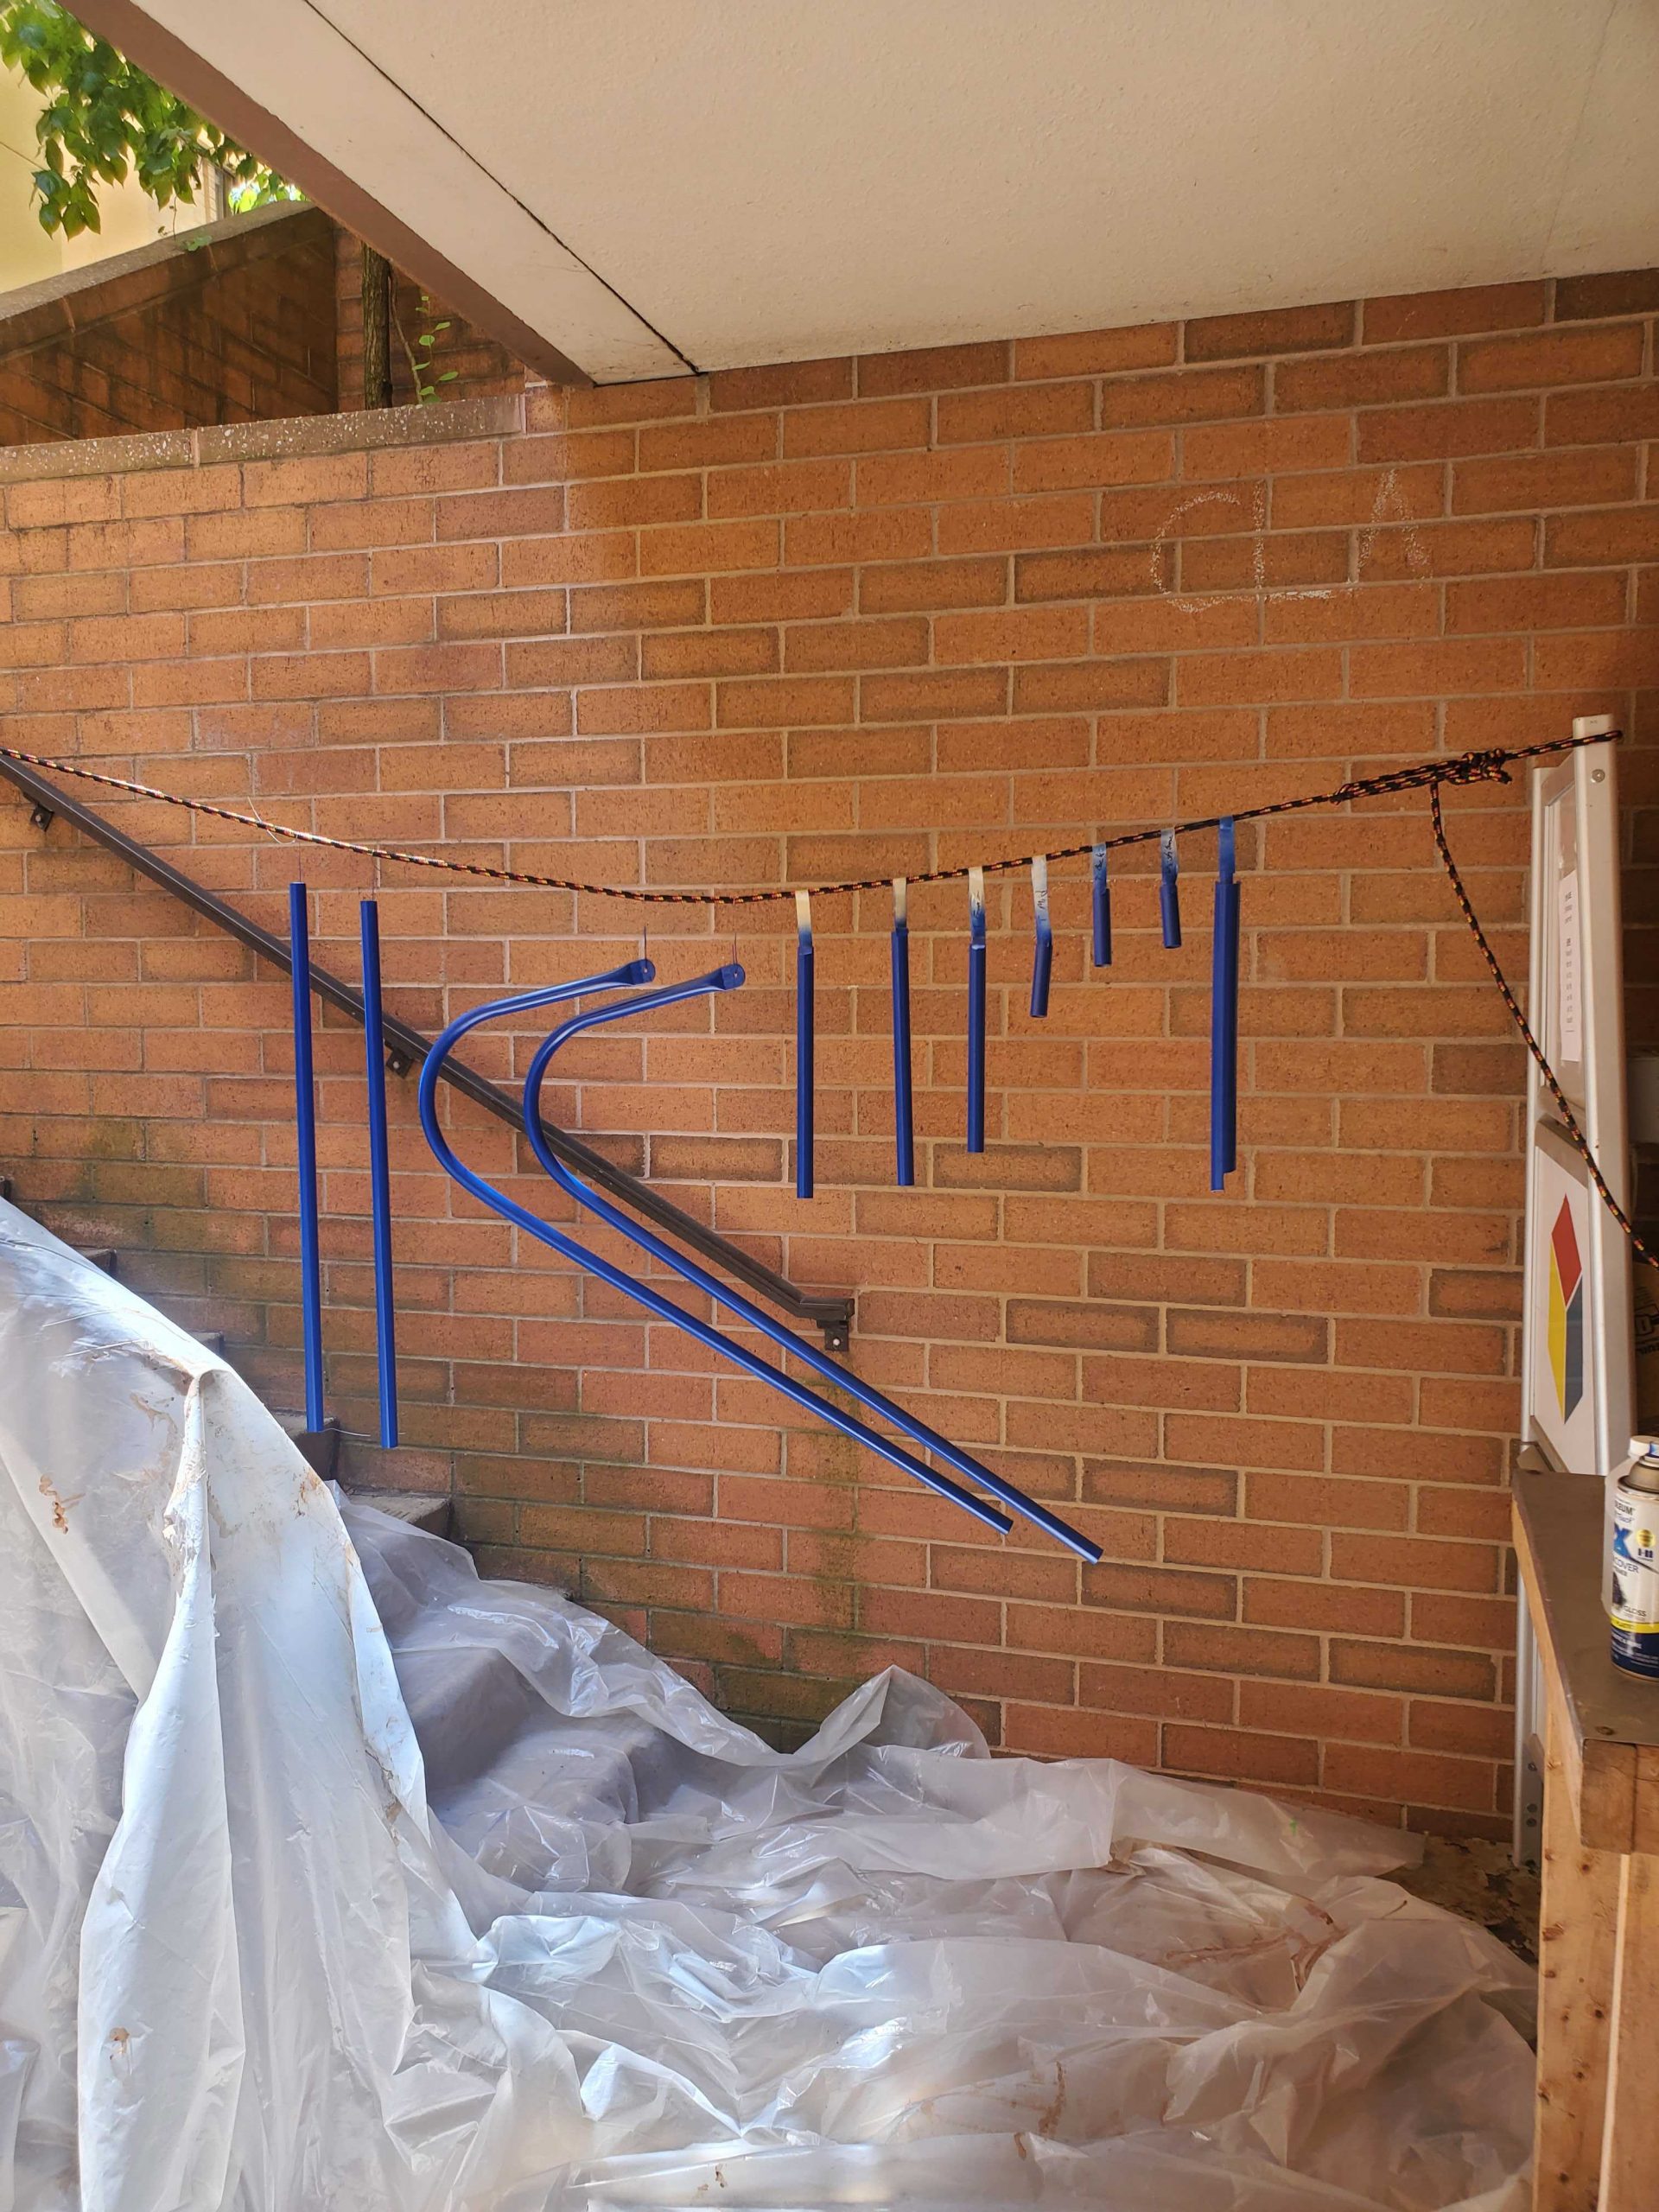
I started by bending two 10 foot sections of electrical conduit into these large 7 shapes with a conduit bender. Benders like this are what electricians use to bend this conduit normally and I was able to borrow one from my local makespace. I simply held the pipe up to the side of the bicycle and bent it to something that looked correct. I then bent the second pipe a little more than this, bending the second pipe back until the 2 matched. After the bending was complete I cut both to length. again holding them up against the side of the bicycle to determine The correct size. In order to attach the new rack to the rear dropouts I needed a flat place to drill and attach a bolt. So I flattened a section of pipe by crushing it in a bench vice. The very front of the rack would be held to the front seat post using a normal bicycle stem. Thankfully this component comes with the tandem because this is where the handlebars are normally located .
Attaching the rack
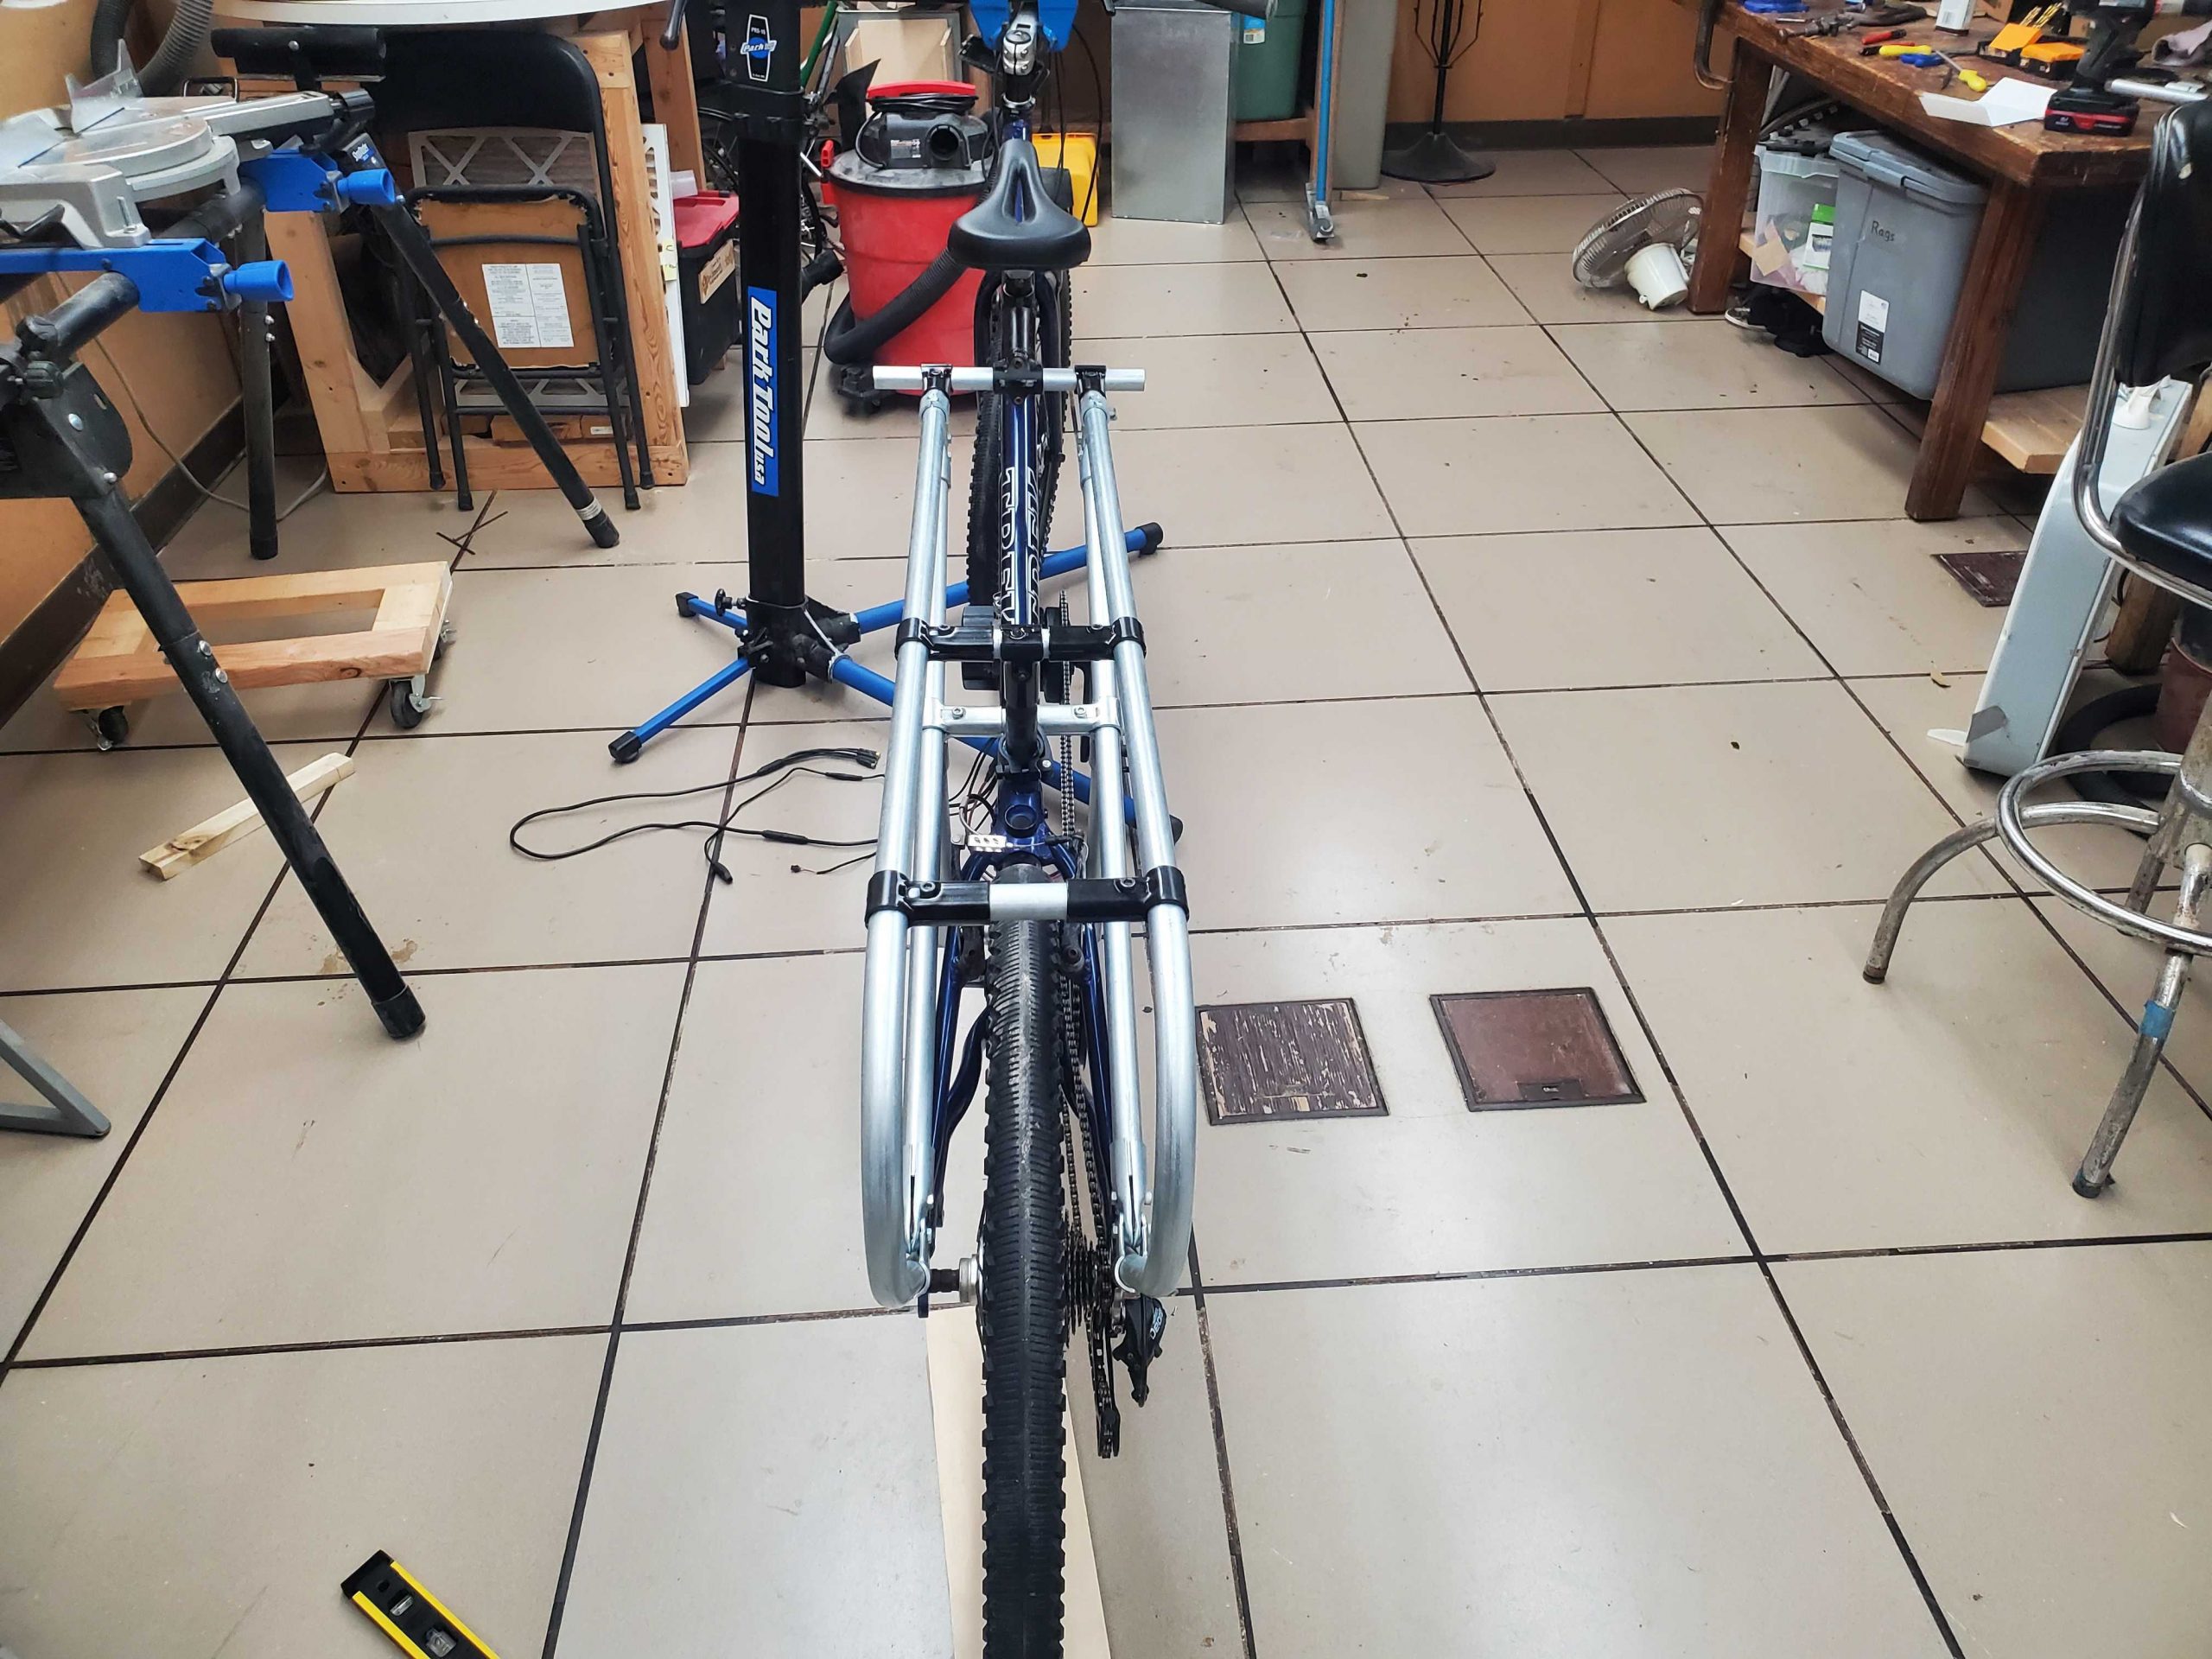
The middle of the rack was supported on the second seat post with a t bracket. I found that these 2 components fit almost perfectly together. A small piece of inner tube rubber was all that was needed for a tight and structural Fit. At this point I added several lower structural components. The large diagonal braces help to make sure that the bends in the pipe don’t collapse under heavy loads. I also added a few lower braces which make sure that the bag over the back of the rack will not contact the wheel or Drive components. When all this was done I had test fitted everything on the bicycle to make sure I had all of the components necessary. During the test fitting I checked the entire rack was stable. This mostly included sitting on it and rolling around. I feel confident that this rack will hold at least 200 or 250 pounds if not more.
Painting
After this I took everything apart to paint. Painting electrical conduit is fairly important to prevent rusting corrosion and wet weather. I happened to have some electric components lying around from a former project which I used to make the bike Electric. This is not a necessary step to having a cargo bike. With a good spread of gears you can carry even extremely heavy loads even long distances or up steep inclines.
Finishing up
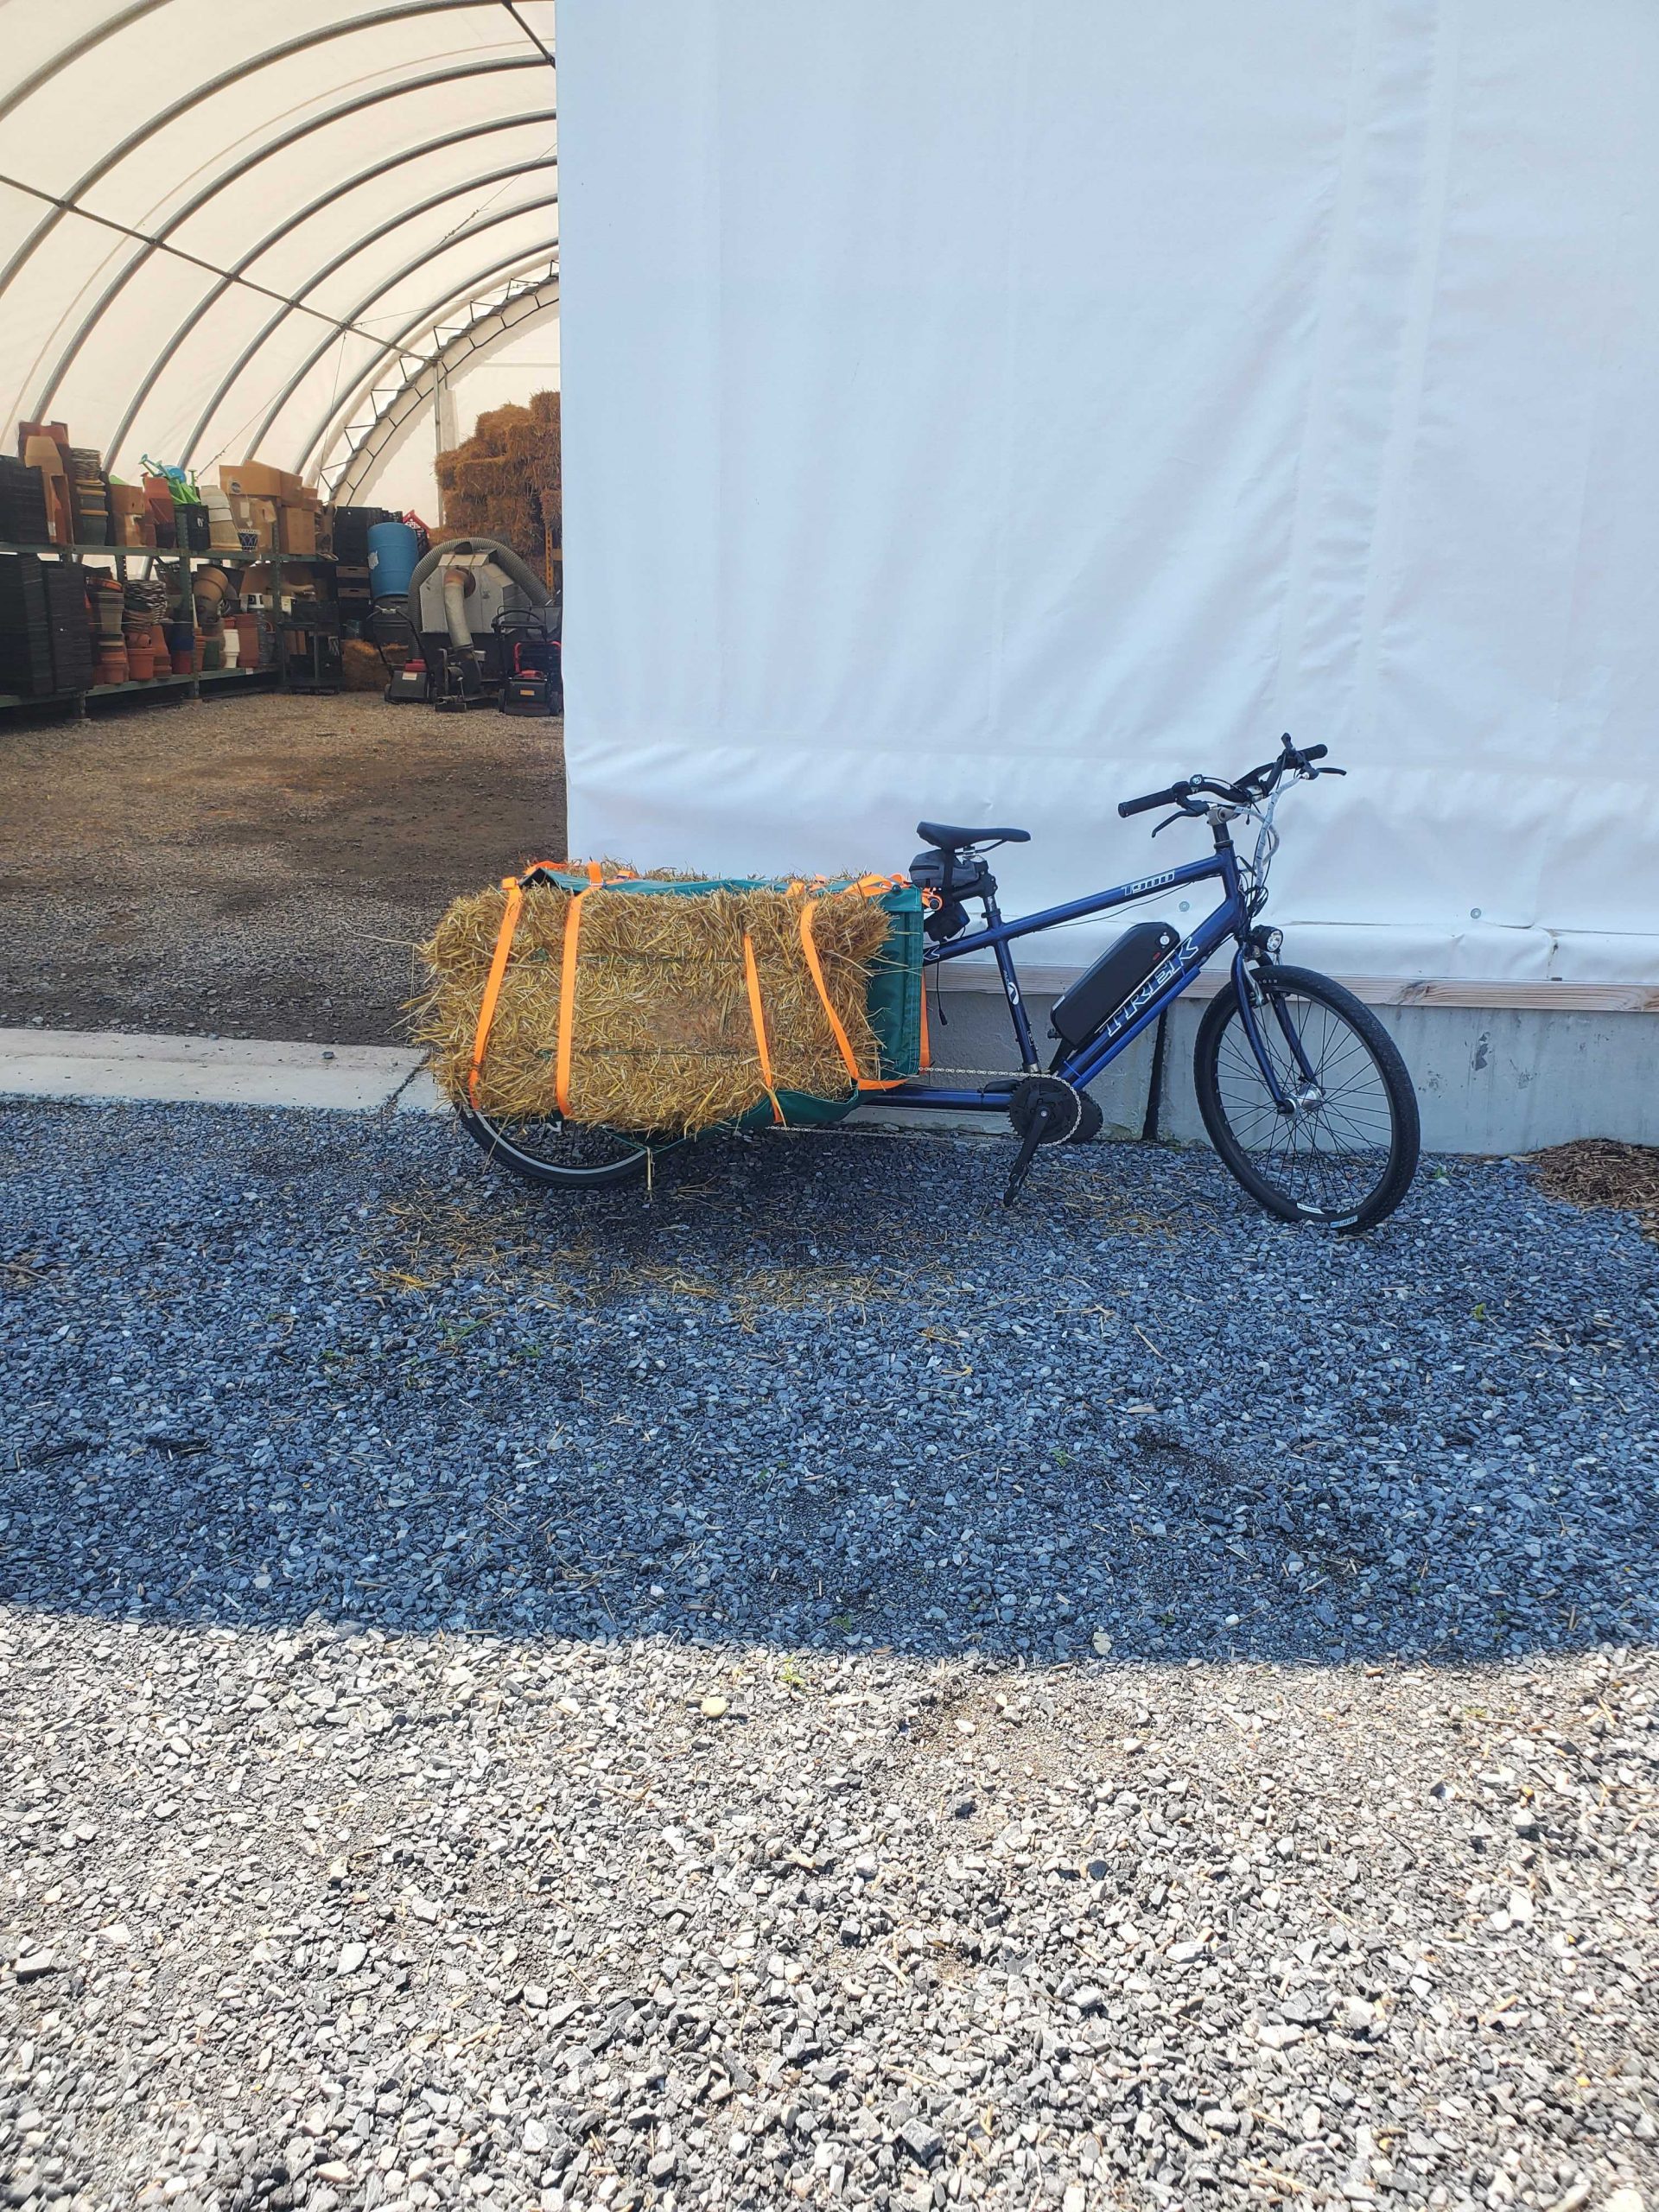
Once all of the components were painted I reassembled the rack and once again tested it by having a person sit on the back of it while I rode it around. I then sewed a series of bags for the back of the cargo frame which may be another post entirely. I’ve been using this cargo bike for around a month now. In that time I’ve put about 300 miles on it and carried everything from groceries to the hay bales pictured here. It carries bulky and heavy items with relative ease. I’m sorry to say I still haven’t figured out a good way to carry a full 4 by 8 sheet of plywood. I’m working on that next.